
Building a Simple Multi-Layer Perceptron (MLP): A Step-by-Step Guide
February 5, 2025In this tutorial, we will guide you through the process of building a simple Multi-Layer Perceptron (MLP) from scratch using Python and TensorFlow. We’ll use the MNIST dataset of handwritten digits to train and test our MLP, and every step will be accompanied by a screenshot to make it easier for beginners to follow along. This article is perfect if you are new to neural networks and want a hands-on introduction to building your first MLP model. Let’s dive in!
What is an MLP?
A Multi-Layer Perceptron (MLP) is a fundamental type of neural network that consists of three main layers: an input layer, one or more hidden layers, and an output layer. The input layer receives the data, the hidden layers process the data, and the output layer generates the final prediction. An MLP “learns” by adjusting its weights and biases during the training phase, allowing it to make more accurate predictions over time.
Setting Up the Environment
To start building our MLP, we need to set up the development environment by installing a few necessary libraries. Open your terminal and run the following command to install TensorFlow, NumPy, and Matplotlib:

After installing the libraries, we can begin by importing them into our Python script. These libraries will help us load the data, build the MLP model, and visualize the results. Here’s the code to import them:

Building the MLP
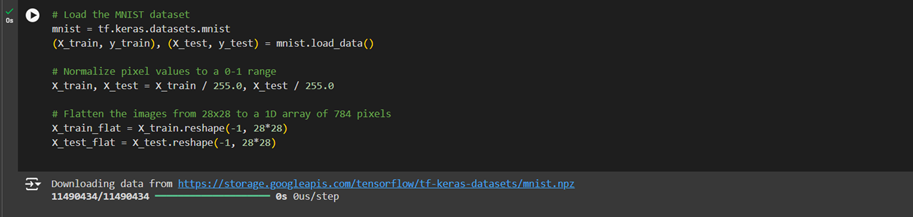
The first step in building the MLP is to load and preprocess the data. We’ll be using the MNIST dataset, which consists of 28×28 pixel images of handwritten digits ranging from 0 to 9. TensorFlow provides this dataset out-of-the-box, so loading it is simple. After loading the data, we need to normalize the pixel values to be between 0 and 1. This makes the training process smoother. We’ll also flatten each 28×28 image into a single vector of 784 pixels, which will serve as input for our MLP model.
With the data prepared, we can now define the architecture of the MLP model. We’ll use the Sequential API provided by TensorFlow’s Keras module, which allows us to easily stack layers. Our MLP will have an input layer, two hidden layers, and an output layer. The first hidden layer will contain 128 neurons, and the second will have 64 neurons. Both of these layers will use the ReLU activation function, which helps the model learn complex patterns. The output layer will have 10 neurons, one for each possible digit (0-9), and will use the softmax activation function to output probabilities for each class.

Training the MLP
Before we can train the MLP, we need to compile the model. Compiling involves specifying the loss function, which helps the model understand how far its predictions are from the actual labels. In this case, we’ll use sparse_categorical_crossentropy, which is commonly used for classification problems where the labels are integers (like in our MNIST dataset). We also define the optimizer, which is the algorithm that adjusts the model’s weights during training to minimize the loss. We’ll use the popular Adam optimizer for this. Lastly, we’ll track the accuracy metric to evaluate how well the model is performing.

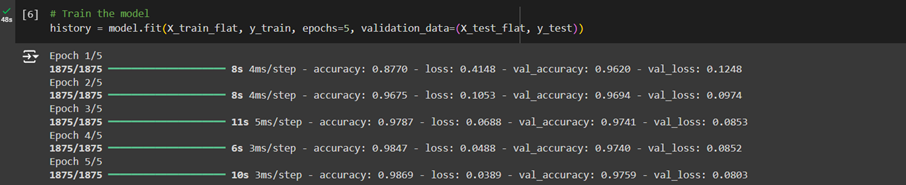
Once the model is compiled, we can begin the training process. We’ll train the MLP using the fit() method, which will allow the model to learn from the training data. We’ll train it for 5 epochs, meaning the model will see the entire dataset 5 times. We’ll also evaluate the model on the test dataset after each epoch to see how well it generalizes to unseen data.
Testing the MLP
Now that the model has been trained, it’s time to evaluate its performance on the test data. We can use the evaluate() method to calculate the test accuracy, which will tell us how well the MLP performs on data it has never seen before. A good test accuracy indicates that the model has learned to generalize well beyond the training examples.

In this guide, we built a simple Multi-Layer Perceptron (MLP) using Python and TensorFlow, covering everything from loading the MNIST dataset to training and testing the model. The MLP is a basic yet powerful neural network. Now that you’ve completed this project, feel free to experiment by adding layers, adjusting activation functions, or trying new datasets. Happy coding!